About this deal
We prefer to wear scrunchies and now that I know how to make them, it’s even better! What are scrunchies made of? Hello, I’m Makyla! A sewing and DIY enthusiast and sewing pattern designer. It’s lovely to see you. Silk hair scrunchie golden. Hair tie for all types of medium-sized hair. Scrunchies for women and girls, gift for her. With the long edges of the main scrunchie sewn, we need to get the short ends right sides together so we can sew them next. Custom Bow Holder, Macrame Polaroid Hanger, Headband Holder, Hair Bow Hanger, Christmas Gifts, Custom Wooden Sign, Wall Polaroid Display H74
Fold the fabric lengthwise, right sides together and stitch along the long side using a ¼ up to ⅜″ seam allowance. STEP 6 – Turn Right Side Out
Fluffy White Chiffon Scrunchie, Sassy Scrunchie Shop US, Hair Accessories, Hairbows, Hair Ties, Hair Care Match up the folded edges, so the hair tie is inside the fabric. If this looks confusing to you, scroll up to watch the video tutorial. First, make the base scrunchie as described in the pattern above. And then, add the bow pieces according to the patterns that follow. How to Make a Knot Bow Scrunchie
Once you’ve gotten the short end to meet each other, match up the edges with the right sides together. Use pins to secure the layers. Sew with a 3/8″ seam allowance. Step 4. Turn right side out.I’ve researched a LOT of scrunchie tutorials, but there aren’t many methods for hair tie scrunchies. So I sat down and brainstormed my own way. I definitely think this is the easiest. PRO TIP: It helps to pin the corners together first, then fill in the remaining length of fabric with pins. It only takes sewing an extra-long tube of fabric, and a straight stitch. So easy and what you get is a beautiful classic look! Like above with all the other scrunchies, first, make the main piece. Then it's time for the classic bow part. It's so easy! Because you'll only sew a strip of fabric: Thread the elastic through the scrunchie, holding both ends so it begins to gather up the fabric. Pin both ends of the elastic together. Sew these together with a few rows of stitching to secure on place.
For the basic scrunchies and scrunchies with short and medium ears, I recommend using a stretch velvet fabric. This gives it a nice, full look. Once you have the pattern taped together, cut out the pattern pieces along the lines corresponding to the scrunchie style you want to sew. Cut a rectangle of fabric 3” x 16”. Also cut 2 on fold of EITHER the Long Bowor Short Bow pattern pieces. Lightweight fabrics like quilting cotton, chambray, jersey, and rayon will gather easily and will give your scrunchie a full, ruffled look. When the hair goes up, we mean business. With the Bow Scrunchie, there’ll be one less distraction, so that you can take action. Plus with three versatile colours and an integrated bow, it’ll elevate your look whether you’re training or resting.
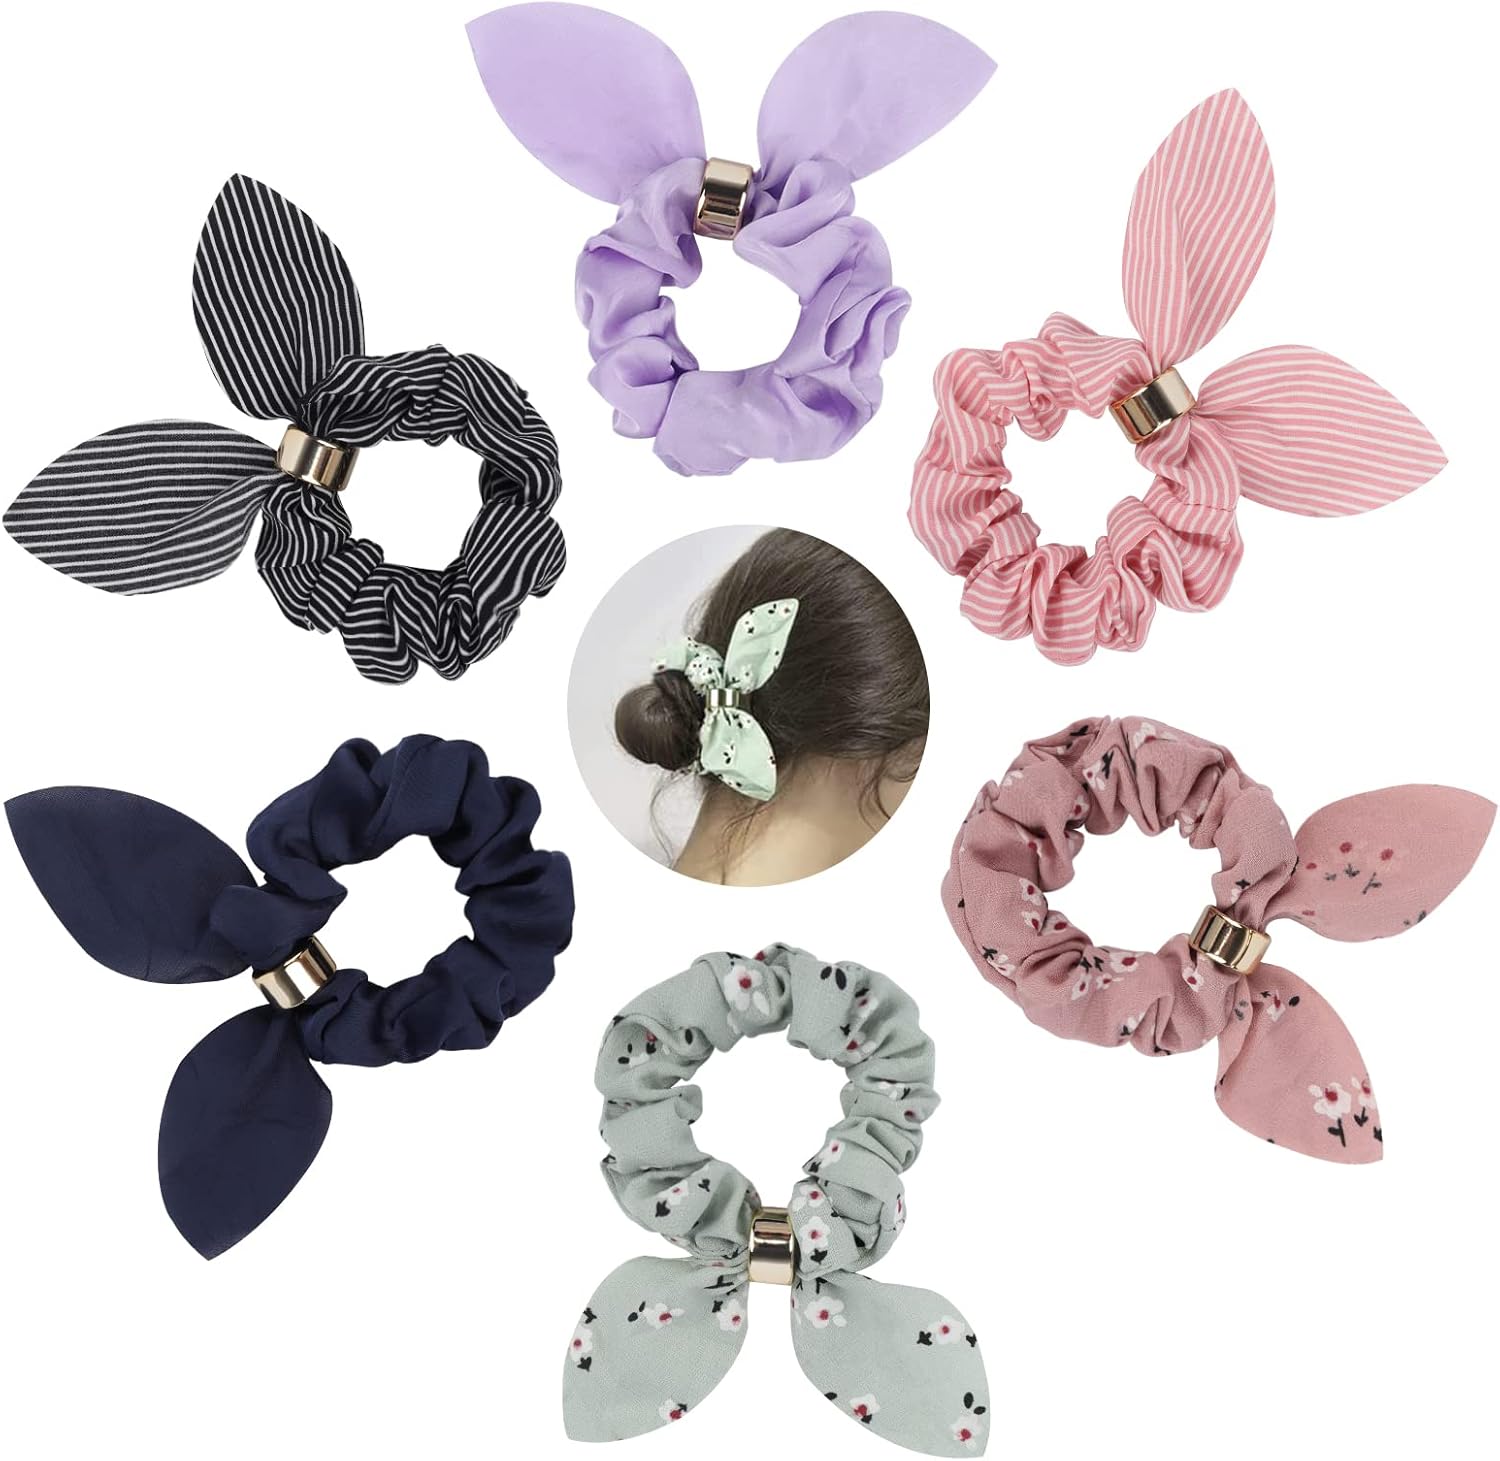
This version of my scrunchie pattern gives you a fun bunny ear variation. Did I mention this is my favorite style? I've made more of these scrunchies than I can count! Scrunchies with Medium Bunny Ears Fold the fabric in half and pin to hold in place. Sew along the pinned edge 3″ (8cm)with a 1/4 inch seam allowance then stop sewing and leave a small opening about 2″ (5cm) wide. Turn the bow tie through the small opening in the seam to the right sides and press flat. Use your sewing machine to stitch up the small opening.
In this tutorial, I’ll teach you how to sew a classic scrunchie. I’ll also show you how to add 3 different bow variations to your scrunchies.
Cut 6.5” of ¼” elastic. Use a safety pin to push the elastic through the tube. The tube is longer than the elastic so it will have to bunch up. I like to put a second safety pin at the other end of the elastic to help keep it from sliding up into the tube. Step 1: To cut out the fabric for your bow, fold your fabric in half and place the pattern pice on top with the top edge along the fold. Pin the pattern in place and then cut out the fabric – you need to do this twice so that you have two identical pieces of fabric which open out to look like this… Velvet Scrunchies with Ribbon • Soft Velvet Fabric Hair Tie • Velvet Scrunchies • Handmade Scrunchies • Regular Scrunchies Step 3: Clip the corners. Turn the scarf right side out through the remaining gap. Press if desired. Start working the safety pin through the scrunchie by pushing it further into the tube, then pulling the fabric over it.
 Great Deal